Contents
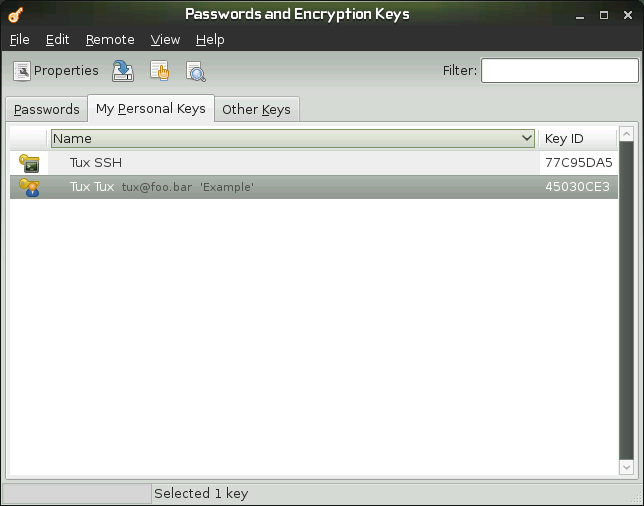
The GNOME Passwords and Encryption Keys program is an important component of the encryption infrastructure on your system. With the help of this program, you can create and manage PGP and SSH keys, import and export PGP and SSH keys, share your keys with others, back up your keys and keyring, cache your passphrase, and encrypt and decrypt the clipboard.
Signing means attaching electronic signatures to email messages or even software to prove its origin. To keep someone else from writing messages using your name, and to protect both you and the people you send them to, you should sign your mails. Signatures help you easily check the sender of the messages you receive and distinguish authentic messages from malicious ones.
Software developers sign their software so that you can check the integrity. Even if you get the software from an unofficial server, you can verify the package with the signature.
You might also have sensitive information you want to protect from other parties. Encryption helps you transform data and make it unreadable for others. This is important for companies so they can protect internal information as well as their employees' privacy.
To exchange encrypted messages with other users, you must first generate your own key pair. One part of it—the public key—is distributed to your communication partners, who can than use it to encrypt the files or email messages they send. The other part of the key pair—the private key—is used to decrypt the encrypted contents.
![[Important]](admon/important.png) | |
The public key is intended for the public and should be distributed to all your communication partners. However, only you should have access to the private key. Do not grant other users access to this data. | |
OpenPGP is a non proprietary protocol for encrypting email with the use of public key cryptography based on PGP. It defines standard formats for encrypted messages, signatures, private keys, and certificates for exchanging public keys.
Click +++.
Click ++.
Specify your full name, email address, and comment, if needed.
Click to specify the following advanced options for the key.
- Encryption Type
Specifies the encryption algorithms used to generate your keys. is the recommended choice because it lets you encrypt, decrypt, sign, and verify as needed. Both and allow only signing.
- Key Strength
Specifies the length of the key in bits. The longer the key, the more secure it is (provided a strong passphrase is used), but keep in mind that performing any operation with a longer key requires more time than it does with a shorter key. Acceptable values are between 1024 and 4096 bits. At least 2048 bits is recommended.
- Expiration Date
Specifies the date at which the key will cease to be usable for performing encryption or signing operations. You will have to either change the expiration date or generate a new key or subkey after this amount of time passes. Sign your new key with your old one before it expires to preserve your trust status.
Click to create the new key pair.
The dialog box opens.
Specify the passphrase twice for your new key, then click .
When you specify a passphrase, use the same practices you use when you create a strong password. The main difference between a password and a passphrase is that spaces are valid characters in a passphrase.
Secure Shell (SSH) is a method of logging into a remote computer to execute commands on that machine. SSH keys are used in key-based authentication system as an alternative to the default password authentication system. With key-based authentication, there is no need to manually type a password to authenticate.
Click +++.
Click ++.
Select , then click .
Specify a description of what the key is to be used for.
You can use your email address or any other reminder.
Optionally, click to specify the following advanced options for the key.
Encryption Type. Specifies the encryption algorithms used to generate your keys. Select to use the Rivest-ShamirAdleman (RSA) algorithm to create the SSH key. This is the preferred and more secure choice. Select to use the Digital Signature Algorithm (DSA) to create the SSH key.
Key Strength. Specifies the length of the key in bits. The longer the key, the more secure it is (provided a strong passphrase is used), but keep in mind that performing any operation with a longer key requires more time than it does with a shorter key. Acceptable values are between 1024 and 4096 bits. At least 2048 bits is recommended.
Click to create the new key, or click to create the key and set up another computer to use for authentication.
Specify the passphrase for your new key, click , then repeat.
When you specify a passphrase, use the same practices you use when you create a strong password. The main difference between a password and a passphrase is that spaces are valid characters in a passphrase.
You can modify properties of existing OpenPGP or SSH keys.
The descriptions in this section apply to all OpenPGP keys.
Click +++.
Double-click the PGP key you want to view or edit. (or select the key, then click on in toolbar).
Use the options on the tab to add a photo to the key or to change the passphrase associated with the key.
Photo IDs allow a key owner to embed one or more pictures of themselves in a key. These identities can be signed just like normal user IDs. A photo ID must be in JPEG format. The recommended size is 120×150 pixels.
If the chosen image does not meet the required file type or size, Passwords and Encryption Keys can resize and convert it on the fly from any image format supported by the GDK library.
Click the tab to add a user ID to a key.
See Section 8.3.1.1, “Adding a User ID” for more information.
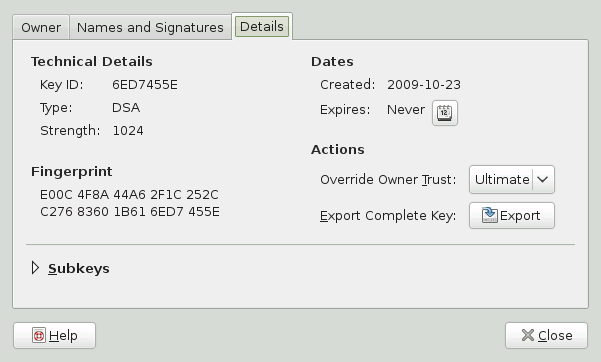
Click the tab, which contains the following properties:
Key ID: The Key ID is similar to the Fingerprint, but the Key ID contains only the last eight characters of the fingerprint. It is generally possible to identify a key with only the Key ID, but sometimes two keys might have the same Key ID.
Type: Specifies the encryption algorithm used to generate a key. DSA keys can only sign. ElGamal keys are used to encrypt.
Strength: Specifies the length, in bits, of the key. The longer the key, the more security it provides. However, a long key will not compensate for the use of a weak passphrase.
Fingerprint: A unique string of characters that exactly identifies a key.
Created: The date the key was created.
Expires: The date the key can no longer be used (a key can no longer be used to perform key operations after it has expired). Changing a key's expiration date to a point in the future re-enables it. A good general practice is to have a master key that never expires and multiple subkeys that do expire and are signed by the master key.
Overide Owner Trust: Here you can set the level of trust in the owner of the key. Trust is an indication of how sure you are of a person's ability to correctly extend the web of trust. When you are faced with a key you have not signed, the validity of that person's key will be determined based on the signatures they have collected and how well or not you trust the people who have made those signatures.
Exportr Complete Key: Exports the key to a file.
Subkeys: See Section 8.3.1.2, “Editing OpenPGP Subkey Properties” for more information.
Click .
User IDs allow multiple identities and email addresses to be used with the same key. Adding a user ID is useful, for example, when you want to have an identity for your job and one for your friends. They take the following form:
Name (comment) <e-mail address>
Click +++.
Double-click the PGP key you want to view or edit (or select the key, then click in the toolbar).
Click the tab, then click .
Specify a name in the field.
You must enter at least five characters in this field.
Specify an email address in the field.
Your email address is how most people will locate your key on a key server or other key provider. Make sure it is correct before continuing.
In the field, specify additional information that will display in the name of your new ID
This information can be searched for on key servers.
Click .
Each OpenPGP key has a single master key used to sign only. Subkeys are used to encrypt and to sign as well. In this way, if your sub key is compromised, you don't need to revoke your master key.
Click +++.
Double-click the PGP key you want to edit (or select the key, then click in the toolbar).
Click the tab, then click .
Use the button to on the left of the dialog box to add, delete, expire, or revoke subkeys.

Each subkey has the following information:
ID: The identifier of the subkey.
Type: Specifies the encryption algorithm used to generate a subkey. DSA keys can only sign, ElGamal keys are used to encrypt, and RSA keys are used to sign or to encrypt.
Created: Specifies the date the key was created.
Expires: Specifies the date the key can no longer be used.
Status: Specifies the status of the key.
Strength: Specifies the length, in bits, of the key. The longer the key, the more security it provides. However, a long key will not compensate for the use of a weak passphrase.
Click .
The descriptions in this section apply to all SSH keys.
Click +++.
Double-click the Secure Shell key you want to view or edit (or select the key, then click in the toolbar).
Use the options on the tab to change the name of the key or the passphrase associated with the key.
Click the tab, which contains the following properties:
Algorithm: Specifies the encryption algorithm used to generate a key.
Strength: Indicates the length in bits of a key. The longer the key, the more security it provides. However, a long key does not make up for the use of a weak passphrase.
Location: The location where the private key has been stored.
Fingerprint: A unique string of characters that exactly identifies a key.
Export Complete Key: Exports the key to a file.
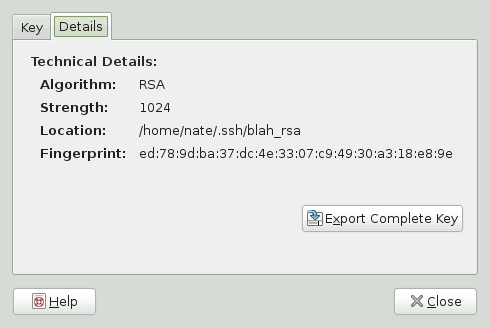
Click .
To import keys:
Click +++.
Click +.
Select a file containing at least one ASCII armored public key.
Click to import the key.
You can also paste keys inside Passwords and Encryption Keys:
Select an ASCII armored public block of text, then copy it to the clipboard.
Click +++.
Click +
To export keys:
Click +++.
Select the keys you want to export.
Click +.
Specify a filename and location for the exported key.
Click to export the key.
You can also export keys to the clipboard in an ASCII armored block of text:
Click +++.
Select the keys you want to export.
Click +.
Signing another person's key means that you are giving trust to that person. Before signing a key, carefully check the key's fingerprint to ensure that the key really belongs to that person.
Trust is an indication of how sure you are of a person's ability to correctly extend the web of trust. When you are faced with a key you have not signed, the validity of that person's key will be determined based on the signatures they have collected and how well or not you trust the people who have made those signatures. By default, an unknown key will require three signatures with marginal trust value or one fully trusted signature.
Click +++.
Select the key you want to sign from the or tabs.
Click +.
Select how carefully the key has been checked, then indicate if the signature should be local to your keyring, and if your signature can be revoked
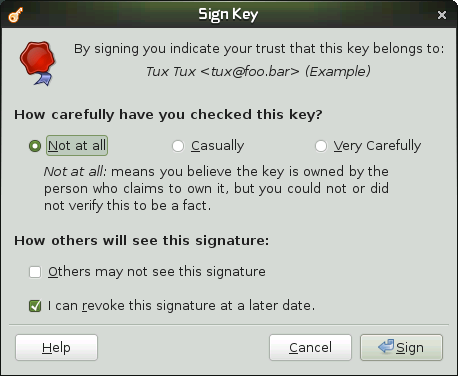
Click .
Passwords and Encryption Keys integrates with the Nautilus file manager. You can encrypt, decrypt, sign, and verify files, as well as import public keys from the file manager window without launching Passwords and Encryption Keys.
![[Note]](admon/note.png) | Enabling File Manager Integration |
|---|---|
The package | |
In Nautilus, right-click the files you want to encrypt.
Select .
Select the people (recipients) you want to encrypt the file to, then click .
In Nautilus, right-click the files you want to sign.
Select .
Select a signer, then click .
If prompted, specify the passphrase of your private key, then click .
To decrypt an encrypted file in Nautilus, simply double-click the file you want to decrypt.
If prompted, specify the passphrase of your private key.
Passwords and Encryption Keys integrates with the gedit text editor. You can quickly encrypt, decrypt, sign, and verify text directly in the text editor.
| Enabling Text Editor Integration |
|---|---|
The package | |
In gedit, select the text you want to encrypt.
From menu, select +.
Select the people (recipients) you want to encrypt the file to, then click .
In gedit, select the text you want to sign.
From menu, select +.
Select a signer, then click .
If prompted, specify the passphrase of your private key, then click .
Passwords and Encryption Keys integrate with the clipboard in GNOME desktop. You can quickly encrypt, decrypt, sign, and verify text in the clipboard.
| Enabling Clipboard Integration |
|---|---|
The package | |
To encrypt, decrypt, sign, or verify text using the encryption applet, follow these steps:
Copy the text to be encrypted, signed, decrypted, or verified to the clipboard.
Left-click the encryption applet icon in the panel and choose the appropriate action from the menu.
If you are encrypting, select recipients. If you are signing, select a signer. You may need to enter a passphrase.
You can paste encrypted, decrypted, signed, or verified text where needed.
Functionality of the Password and Encryption Keys tool can be customized. Possible options are described in this section.
Click +++.
Click tab.
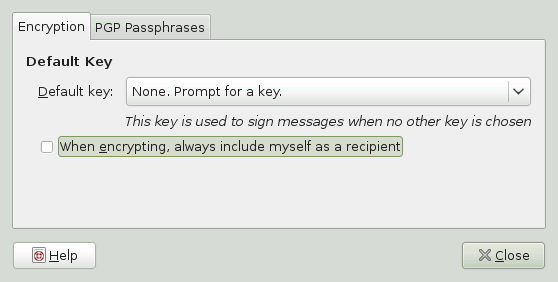
Choose from the following options:
Default Key: Specifies the key you want to use to sign files. Files will be encrypted to this key if the option is selected.
When encrypting, always include myself as a recipient: Select this option to add yourself to the recipients list for all files encrypted by Passwords and Encryption Keys. If you do not select this option, and you do not select yourself as a recipient, you cannot decrypt any files you encrypt.
Click .
Enabling Passwords and Encryption Keys's passphrase caching ability
allows you to perform many operations that require entering your
passphrase without reentering it every time
seahorse-daemon takes the place of
gpg-agent. Letting the cached passphrases
expire is usually a good idea. This will then require reentering your
passphrase, but adds security.
Click +++.
Click the tab.

Choose from the following options:
Never remember passphrases. Select this option to not remember any passphrase.
Remember passphrases for ... minutes. Specifies the amount of time, in minutes, for storing passphrases.
Always remember passphrases whenever logged in. Select this option to remember any passphrases whenever you are logged in to the session.
Ask me before using a cached passphrase. Select this option to ask you before a stored passphrase is used.
Show icon in status area when passphrases are in memory. Select this option to show a warning icon when passphrases are in memory.
Click .
You can use password keyring preferences to create or remove keyrings, to set the default keyring for application passwords or to change unlock password of a keyring. To create a new keyring, follow these steps:
Click +++.
Click ++, then click the .
Enter new keyring's name and press .
Set and confirm new keyring's and click .
To change unlock password of an existing keyring, click on the keyring in the tab and press . You have to provide the old password to be able to change it.
To change the default keyring for application passwords, click on the keyring in the tab and press .
You can keep your keys up-to-date by syncing keys periodically with remote keyservers. Syncing will ensure that you have the latest signatures made on all of your keys, so that the web of trust will be effective.
Click +++.
Click +, then click the tab.
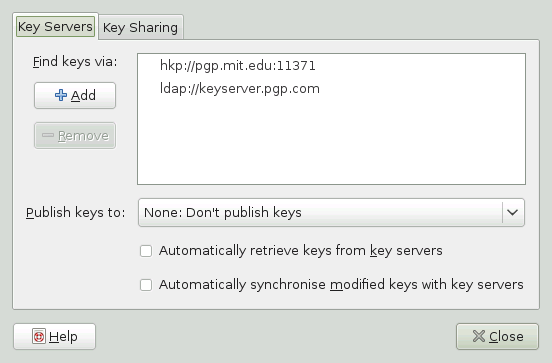
Passwords and Encryption Keys provides support for HKP and LDAP keyservers.
HKP Servers: HKP keyservers are ordinary Web-based keyservers such as the popular hkp://pgp.mit.edu:11371, also accessible at http://pgp.mit.edu.
LDAP Keyservers: LDAP keyservers are less common, but use the standard LDAP protocol to serve keys. ldap://keyserver.pgp.com is a good LDAP server.
You can or keyservers to be used using the buttons on the left. To add a new keyserver, set its type, host and port, if necessary.
Set whether you want to automatically publish your public keys and which keyserver to use. Set whether you want to autopmatically retrieve keys from keyservers and whether to synchronize modified keys with keyservers.
Click .
Key Sharing is provided by DNS-SD, also known as Bonjour or Rendevous. Enabling key sharing adds the local Passwords and Encryption Keys users' public key rings to the remote search dialog box. Using these local key servers is generally faster than accessing remote servers.
Click +++.
Click +, then click the tab.
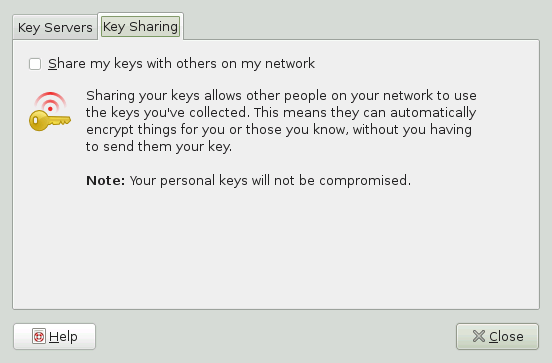
Select .
Click .