| openSUSE-Dokumentation Kapitel 7. Using Voice over IP with Ekiga / 7.2. The Ekiga User Interface | ||||
|---|---|---|---|---|
 | Kapitel 7. Using Voice over IP with Ekiga | 7.3. Making a Call |  | |
| openSUSE-Dokumentation Kapitel 7. Using Voice over IP with Ekiga / 7.2. The Ekiga User Interface | ||||
|---|---|---|---|---|
| Kapitel 7. Using Voice over IP with Ekiga | 7.3. Making a Call | | |
All functions of Ekiga are available via the menu bar. Shortcuts to the most important functions are provided by means of a toolbar to the left and by special key combinations.
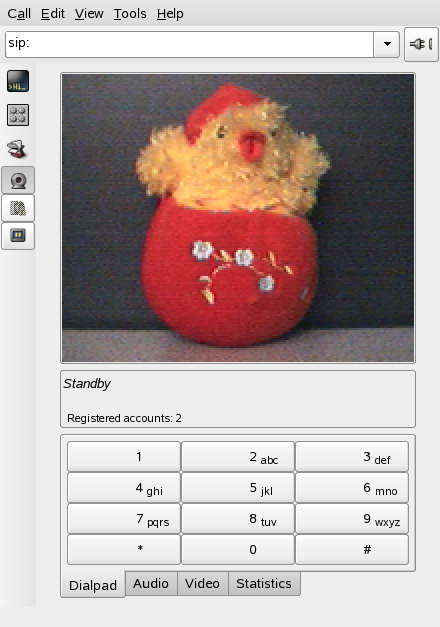
The user interface has different modes. To switch between views, use + and + or select the view mode icon on the left side of the GUI and the different tabs at the bottom. The is shown in Abbildung 7.1, „Ekiga User Interface“. All icons in the toolbar provide a tool tip that is activated on hovering over the icon with your mouse pointer.
At the bottom of the user interface, several tabs provide the functionality for , , and . Some settings like the settings may only be changed during a phone call.
Many of functions of Ekiga are available via keyboard shortcuts. Tabelle 7.1, „Keyboard Shortcuts for Ekiga“ summarizes the most important ones.
Tabelle 7.1. Keyboard Shortcuts for Ekiga
|
Ctrl Sequence |
Description |
|---|---|
|
Ctrl-O |
Initiate a call with the current number. |
|
Ctrl-D |
Hang up. |
|
Ctrl-G |
Hold the current call. |
|
Ctrl-T |
Transfer the current call to another party. |
|
Ctrl-S |
Save the current picture to hard disk. |
|
Ctrl-W |
Close the Ekiga user interface. |
|
Ctrl-Q |
Quit Ekiga. |
|
Ctrl-E |
Start the Accounts manager. |
|
Ctrl-P |
Open the overview. This dialog allows you to do some fine-tuning to your Ekiga settings. |
|
Ctrl-+ |
Zoom in to the picture of the Web cam. |
|
Ctrl-- |
Zoom out or the picture of the Web cam. |
|
Ctrl-= |
Return to the normal size of the Web cam display. |
|
Ctrl-F |
Use full screen for the Web cam. |
|
Ctrl-H |
Display the history of your calls. |